
The Problem
I couldn’t get battery powered projects to run longer than 2-3 weeks on two 3200mAh 18650 batteries.
I like to use ESP8266 dev boards, NodeMCU, WeMos D1 Mini, etc. While being convenient to work with, I found that their quiescent current can be hard to ignore. Especially for projects that spend the majority of their time in deep sleep.
I also wanted to find a solution that didn’t involve desoldering voltage regulators or USB to UART ICs, or anything else that wouldn’t allow me to easily reprogram or repurpose the board in the future.
Solutions & Results
- Deep sleep alone – Surprisingly good with WeMos, 231uA
- TPL5110 power timer driving:
- The microcontroller directly – 2uA, Unstable, couldn’t get it to wake up
- Low side switch using N-channel MOSFET – Low current, 19uA, but couldn’t wake it up
- High side switch using PNP transistor with an NPN driver – The best, 2uA
Components
- NodeMCU

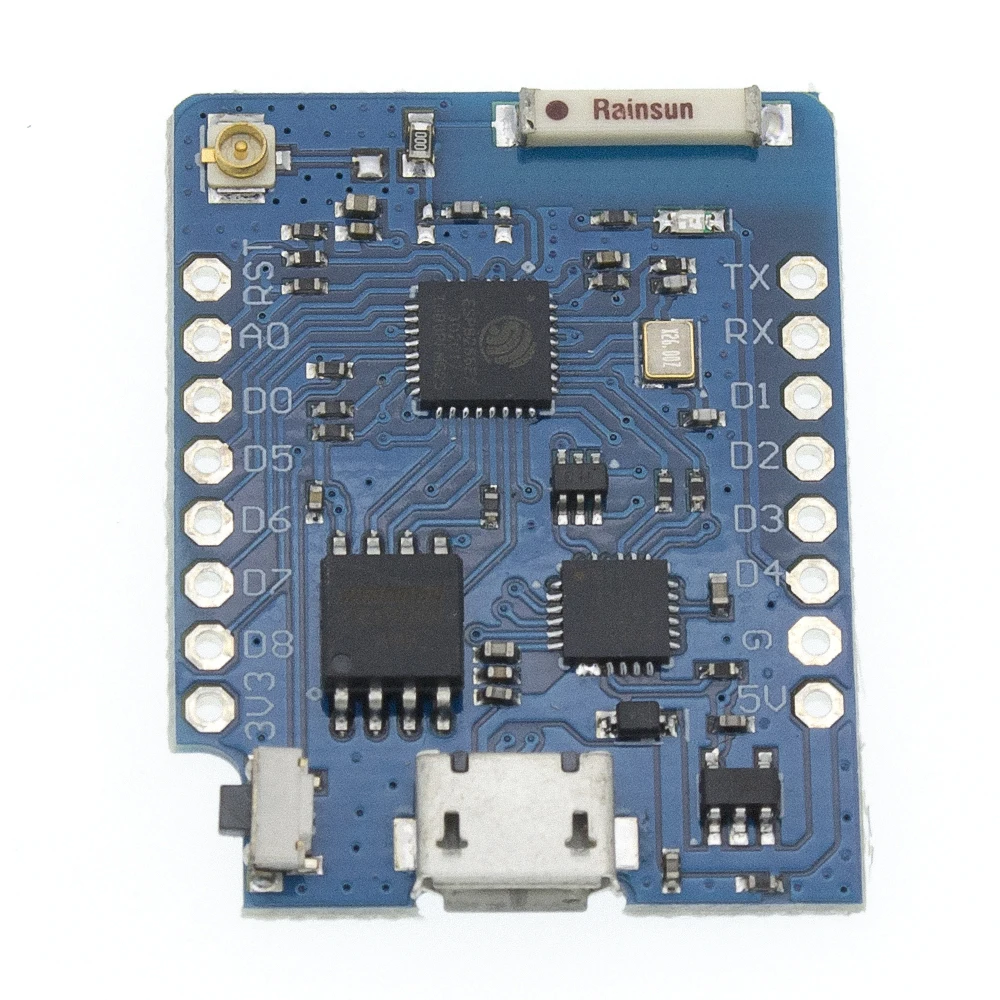
- Knockoff WeMos D1 Mini. Identified by its underpowered 150mA LDO XC6204 (4A2D)
- Adafruit TPL5110 Power Timer breakout board

- 3200mAh 1850 Li-ion battery. I doubt it actually is 3,200mAh but for the purposes of this post we’ll assume it is.
Option 1: Deep sleep alone
| Quiescent Current | |
| NodeMCU | 9.867mA |
| WeMos | 0.231mA |
WeMos is ahead by a mile here. NodeMCU struggles because of the infamous AMS117 LDO voltage regulator and USB to UART components.
NodeMCU was my go-to in the early days of dabbling with IoT so you can see why I had trouble getting any kind of longevity out of my battery powered projects.
NodeMCU would drain 3200mA in 324 hours or just under 2 weeks in infinite deep sleep. That’s unacceptable.
WeMos fairs significantly better, theoretically lasting about 82 weeks or 1.5 years in infinite deep sleep.
Option 2
TPL5110 is a great alternative to ESP8266’s native deep sleep as it accomplishes the same task but is agnostic to what board you are using. You can power the hungry sleeper NodeMCU or already decent Wemos D1 Mini.
Unfortunately using it proved to be a bit fiddly. Below are various approaches I’ve tried after reading many forum posts.
Option 2.1: TPL5110 driving a microcontroller (WeMos) directly via DRV pin
| Driver | Quiescent Current |
| TPL5110 | 2uA |
I measured the quiescent current consumption to be 2uA in this setup. It could’ve been lower but my LDO voltage regulator has a 1-2uA quiescent current and I needed to use it since we’re driving WeMos 3.3V pin directly from TPL5110’s DRV pin.
So far, so good.
However, it is a well documented issue that people are having a rough time running an ESP8266 dev board via TPL5110’s drive pin. Inability to boot ESP (blinking LED on TPL), inconsistent timing, failure to wake up, and various other instabilities plague this option. I struggled with this myself, experimenting with putting large 470uF, 2200uF capacitors between TPL’s various pins. It would work for a week and then suddenly stop.
Despite it being the most obvious and simple option, its inconsistency was too frustrating to be an acceptable solution.
Option 2.2: TPL5110 with a low side switch
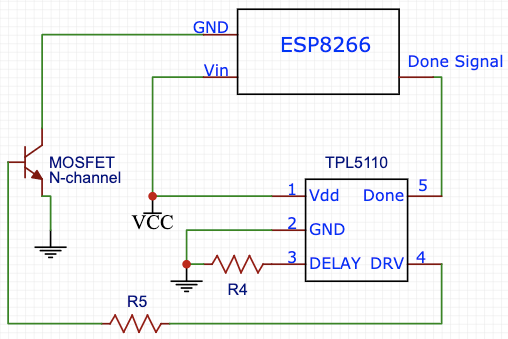
In this scenario timer’s drive pin controls ground connection from ESP8266 using an N-channel MOSFET, an NPN transistor would also work. I used an IRLZ44N for its low gate threshold Vgss(th) of 2V, which guarantees I will be able to drive it with a 3.7V battery.
However, I couldn’t get it to work. The Done pin had to be set high to turn TPL5110’s DRV pin low. Surprisingly (to me), Done pin stayed high after ESP8266 was turned off. That meant that when TPL5110 timer triggered next time to wake it up, it couldn’t, since there was a high signal on the Done pin. (EDIT: I have since looked into the pin states when powering Wemos off using various methods and it became apparent what was happening here)
I couldn’t think of a better solution to that new problem than having a high side switch on the done signal line but that would make this circuit more complex than the Option 2.3, so I moved on.
Option 2.3: TPL5110 with a high side switch
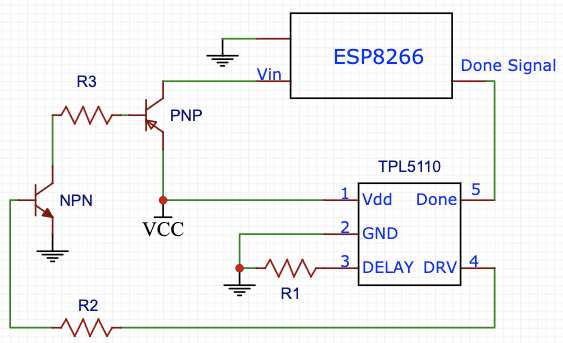
Here, we’re controlling the positive side leading to ESP8266. I used an NPN transistor to drive a PNP transistor that switches the high side. I used transistors because I didn’t have any P-channel MOSFETs available to me.
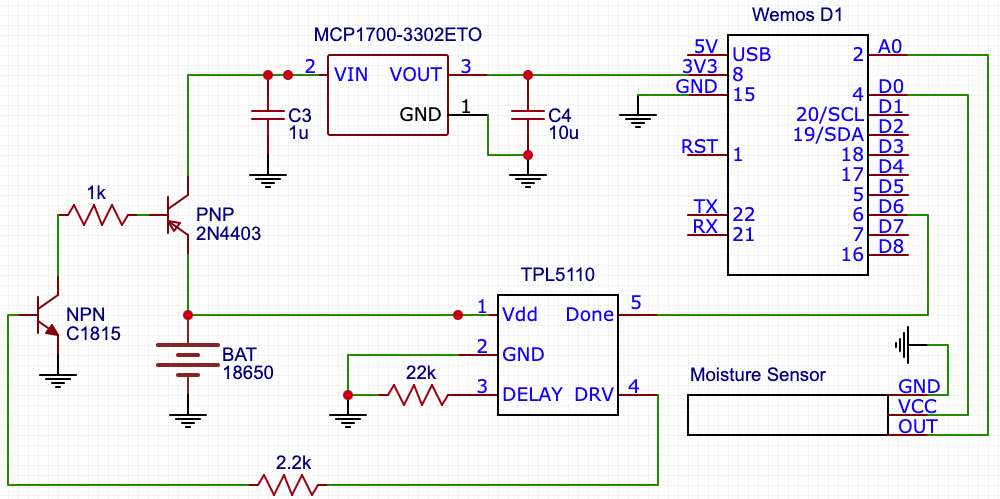
It worked as advertised. Low quiescent current of only 2 micro amperes and a reliable waking up/going to sleep cycle. The circuit posted below, only with a 15 minute delay between readings has been running for 9 days now without a hiccup.
Next step is to reduce WeMos’ awake time for more significant battery savings.
Here’s the complete circuit I used for my battery powered moisture sensor. You can experiment with the 22K GND-DELAY resistor to vary sleep time. 22K is around 1 minute, 67K is around 15 minutes. You can find the table of rough resistance/sleep values on Adafruit site.
If you have a similar story, spotted an issue or have a better solution, please leave a comment.
Leave a Reply